
Quick links:
- Introduction
- Hot-Wam Architecture
- Shard Allocation
- Index Pattern
- How to optimize your cluster architecture to reduce OpenSearch costs
- Conclusion
Introduction
In the ISM review we learned how to create a hot-warm-delete policy. For the purposes of that article, we assumed that all the nodes were equal in terms of hardware, so OpenSearch would move the shards across nodes without being aware of the specs of each of them.
What if we want to optimize the resources by assigning different hardware polifices to different nodes?
Hot-Warm Architecture
The hot-warm-cold architecture aims for resource optimization using different hardware profiles for different phases of our data life.
- Hot: Used for high read/write operations. For this we need our best CPU/RAM nodes here, and we use SSD storage.
- Warm: Lighter search, read only. We can have less powerful nodes here. Warm nodes can use very large spindle drives instead of SSD storage.
Once we have our retention policies defined, we can start thinking where to store our data on each phase, and configure the ILM to put the data in that node.
IMPORTANT: We can store as many shards as we want in a node (the recommendation is no more than 25 shards per GB of heap). However, we cannot store the primary and the replica of the same shard, in the same node.
This means we cannot have 2 nodes and have an index with 1 primary shard and 2 replicas, because two replicas of the same shard, or the primary + 1 replica of the same shard would live in the same node.
For this example we will work with 2 nodes, and configure one to be “hot”, and the other to be “warm”. To see your current nodes you can run this command in Dev Tools:
GET _cat/nodes

Shard allocation
We will configure one node to be “hot”, and the second one to be “warm”. Initially all the index shards will go to the hot node (“node1”) and when ISM changes to the warm phase, the data will be moved to the warm node (“node2”).
First we need to “tag” our nodes to the “temperature” we want them to be. This is achieved by adding the following configuration to each node yml file:
node.attr.temp: hot #node1
node.attr.temp: warm #node2
Note: attribute name “temp” and values “hot, warm” are arbitrary, we can use any names we want as long as they are consistent across configurations.
To confirm the settings were applied, you can run the following command in Dev Tools. Remember to restart your nodes after applying the configuration.
GET _cat/nodeattrs?v&h=node,attr,value
You will see:
node           attr    value
opensearch-node1 temp  hot
opensearch-node2 temp  warm
Index pattern
Now we have to tell our index pattern to allocate the shards to the hot zone on creation, and to then move them through ISM.
Using our data streams example, we’ll run the following:
PUT _index_template/logs-template
{
  "index_patterns": [
    "datalogs-*"
  ],
  "data_stream": {
    "timestamp_field": {
      "name": "@timestamp"
    }
  },
  "template": {
    "settings": {
      "index": {
        "routing": {
          "allocation": {
            "require": {
              "temp": "hot"
            }
          }
        }
      }
    }
  }
}
Now all the indices created under the datalogs-* template will be allocated to the hot zone. Let’s try:
POST datalogs-hot/_doc
{
  "@timestamp": "2022-07-07",
  "name": "1"
}
Let’s see if it picked our ISM policy created in the previous article:
We can see it picked the policy and it’s enabled.
Let’s see now if it allocated correctly:
GET _cat/shards/datalogs-hot?v

As you can see, it only assigned the primary shard (p on prirep) to the node1, which is perfect. It didn’t assign the replica shard (r on prirep) because as we said, you cannot assign the primary and the replica to the same node, and we only have 2 nodes. Node2 is a warm node, so it will not be allocated there because of the limitation we set in the index pattern.
To test our configuration, let’s create the following ISM policy:
- Starting phase will be hot and shards will live in hot node
- After 1 minute do rollover (create a new underlying index)
- After 5 minutes from rollover move to warm
- Move shards to warm node
- Remove replicas
*Times will be longer because ISM takes some minutes between checking status and applying settings. It may take about 10 minutes to start.
Let’s create an ISM policy for this purpose. We will link it to the datalogs-hotwarm pattern. Note there is no wildcard so the name of the index must be exactly datalogs-hotwarm.
PUT _plugins/_ism/policies/hot_warm_test
{
  "policy": {
    "description": "Shards moving across nodes test",
    "schema_version": 1,
    "error_notification": null,
    "default_state": "hot",
    "states": [
      {
        "name": "hot",
        "actions": [
          {
            "retry": {
              "count": 3,
              "backoff": "exponential",
              "delay": "1m"
            },
            "rollover": {
              "min_index_age": "1m"
            }
          }
        ],
        "transitions": [
          {
            "state_name": "warm",
            "conditions": {
              "min_rollover_age": "5m"
            }
          }
        ]
      },
      {
        "name": "warm",
        "actions": [
          {
            "retry": {
              "count": 3,
              "backoff": "exponential",
              "delay": "1m"
            },
            "replica_count": {
              "number_of_replicas": 0
            }
          },
          {
            "retry": {
              "count": 3,
              "backoff": "exponential",
              "delay": "1m"
            },
            "allocation": {
              "require": {
                "temp": "warm"
              },
              "include": {},
              "exclude": {},
              "wait_for": false
            }
          }
        ],
        "transitions": []
      }
    ],
    "ism_template": [
      {
        "index_patterns": [
          "datalogs-hotwarm"
        ],
        "priority": 999
      }
    ]
  }
}
Now let’s create one document and check:
POST datalogs-hotwarm/_doc
{
  "@timestamp": "2022-07-07",
  "name": "1"
}

The output of:

GET _opendistro/_ism/explain/datalogs-hotwarm
GET _cat/shards/datalogs-hotwarm?
Looks just like the beginning.
We can monitor the current ILM state through Index management -> Managed Indices.
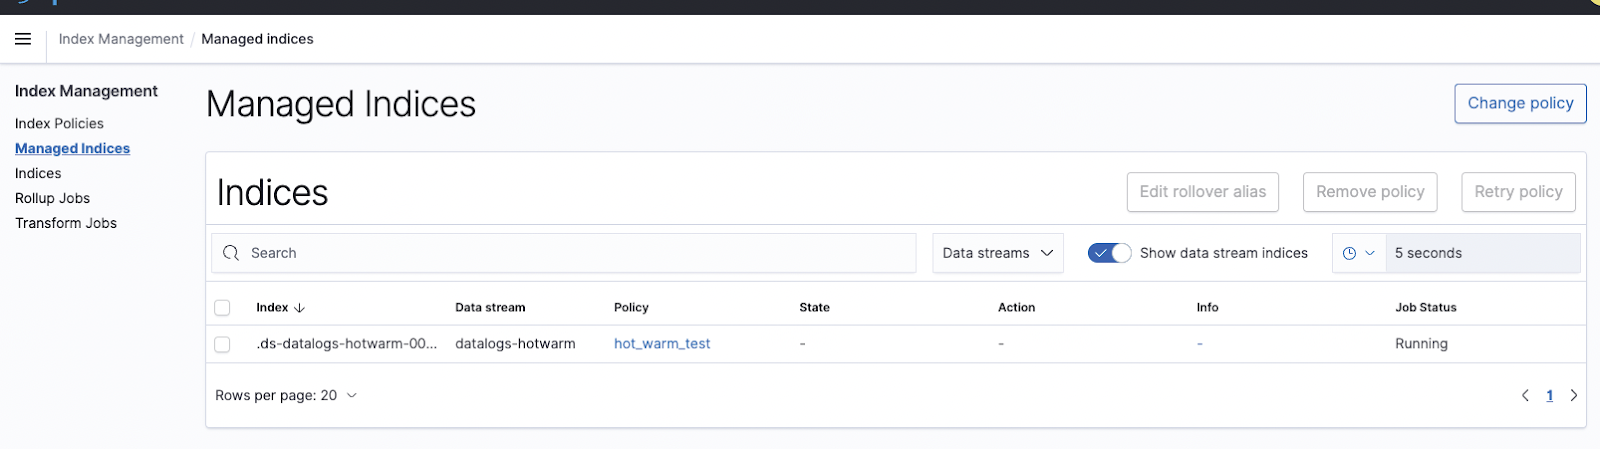
The ISM policy takes some time to activate. If you click the policy name you will see the following message:

If we wait a couple of minutes we will see the ISM policy in action:

The rollover is finished, so now we have two indices:

Now after 5 minutes the rolled over index will move to warm phase, allocate shards to warm node, and then remove replicas:


Let’s confirm there is only 1 shard allocated to node2, and no UNASSIGNED ones:
GET _cat/shards/.ds-datalogs-hotwarm-000001?v
Note that we are now querying the index directly, and not the data stream, because we only want to see where the shards belonging to the rollovered index are being allocated:

Perfect! Only one shard, and allocated to our warm node (node2). From now we can go one step further and create a deletion phase if we want to remove our indices after a period of time.
How to optimize your cluster architecture to reduce OpenSearch costs
Watch the video below to learn how to save money on your deployment by optimizing your cluster architecture.

Conclusion
OpenSearch offers an easy way to configure hot/warm architectures under very specific conditions, visually or using JSON files. By tagging your nodes, you can decide where your data should live depending on hardware specifications and data freshnes.