
Quick links
Background
Imagine there’s a huge data set, and the same aggregations against the data are always run, for example, using a Dashboard that displays a chart.
This can be achieved by using raw data (13059 documents, 1 document per flight), and 2 terms aggregations, one for Airlines, and one for the Destinations inside it.
Nested aggregations might become very expensive at scale, in terms of performance.
Opensearch is optimized for these types of operations, but using “Transforms” can be extremely time saving.
Definition
Transforms allows users to generate new indices based on existing data aggregations. So instead of running an aggregation every time, results can be pre-computed and displayed.
Instead of having 1 document per flight, there’s 1 document per airline per destination, with each of these documents holding the airline name, destination name, and number of flights.
How to create transforms
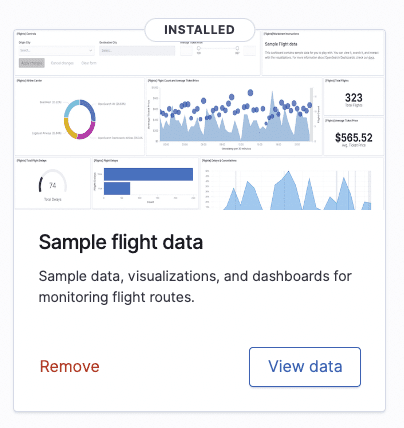
For this example, the Flights Data sample is used. Go to Home → Add data →“Sample Flight Data”
Then, Index Management → Transform Jobs.

And create a new transform job.
Then, choose a name, a source, and a destination index. The destination may or may not exist:
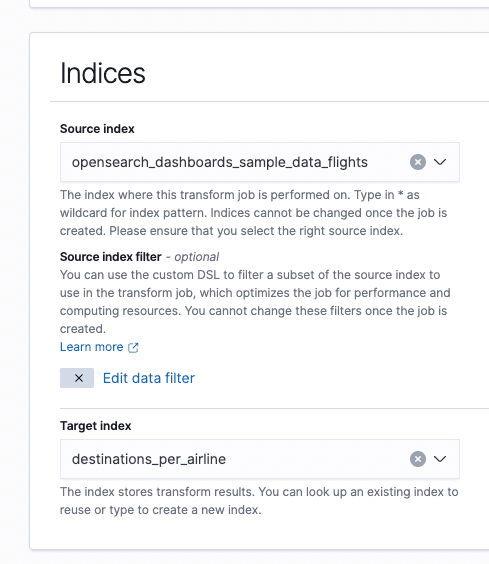
The dataset can be filtered using the DSL query.
In the next window click the plus sign and set the following:
Carrier → Group by name
Dest → Group by name
Dest → Aggregate by count
Users should see the following:

Each of these rows will be a document in the new index.
Click next.
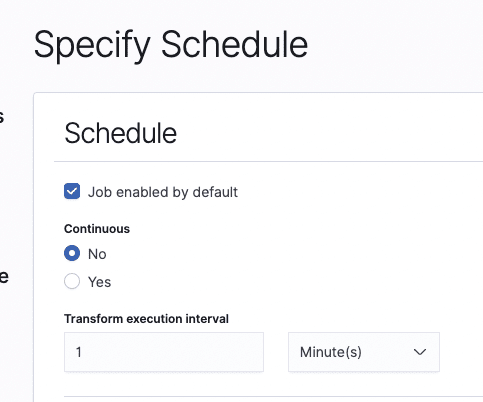
This can be triggered manually or run continuously, depending on user needs. The frequency can be set by adjusting the “Transform Execution Interval” parameter.
Now, users can review the settings and create the job. If “Job enabled by default” is set, and continuously disabled as it is in the screenshot, the job will run once and then disable.

Visualizing data
Now that the index is ready, we can visualize it. Users must create an index pattern for the Transform index.
To create an index pattern go to Stack Management → Opensearch Dashboards → Index Pattern → Create new index pattern.
For the new index, the number of flights per destination of each airline is already computed, the documents just need to be grouped correctly.
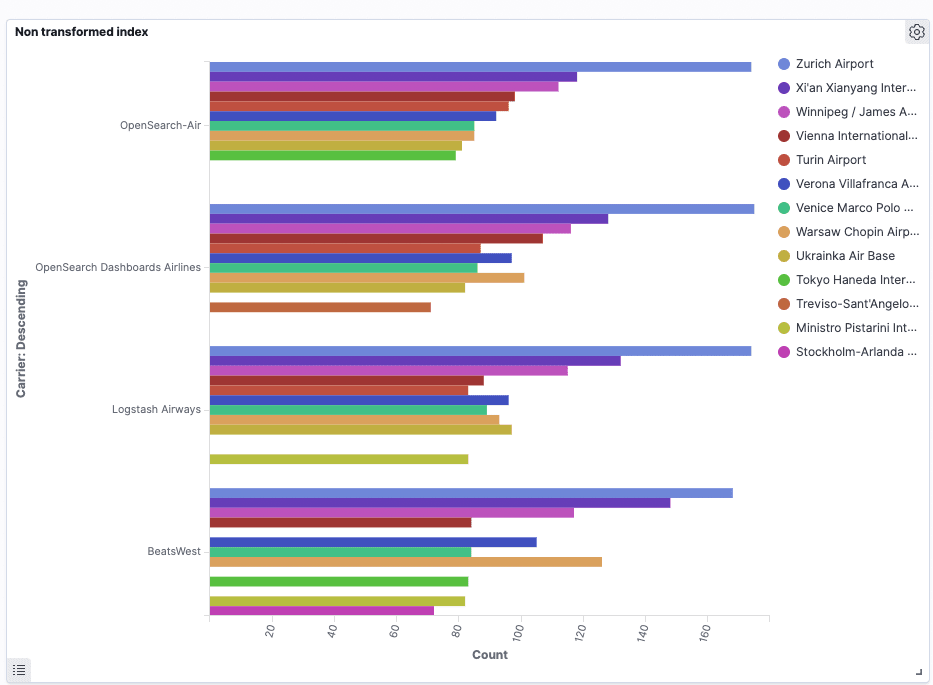
To probe the integrity of the data, see the two tables below: One uses the 13059 documents index and the second uses the transformed index:

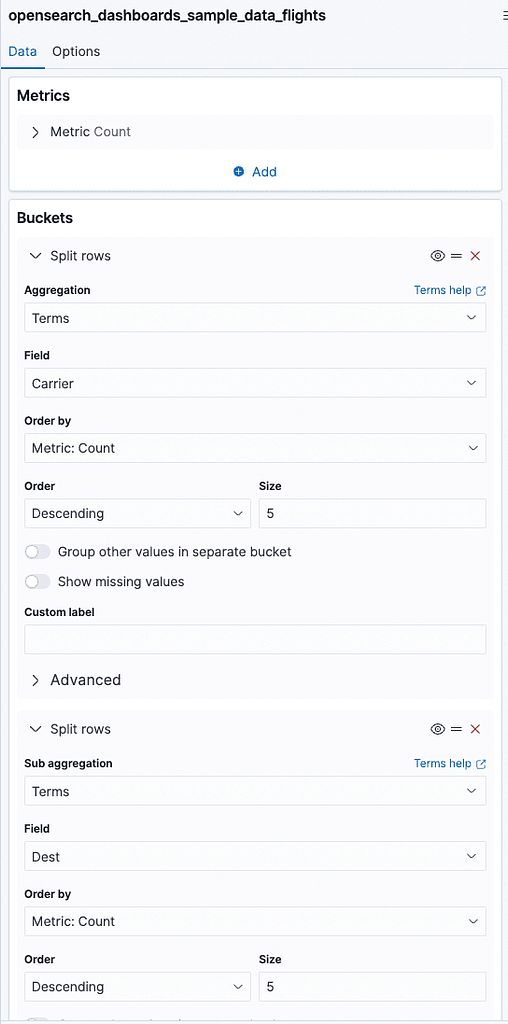
Regular Index
The regular index utilizes the following configuration:
Two aggregations, and then count the documents on each one.
Transformed Index
For the transformed index, do the same aggregations but instead of counting the documents, take the value from “count_Dest,” which will provide the number of destinations each airline had:
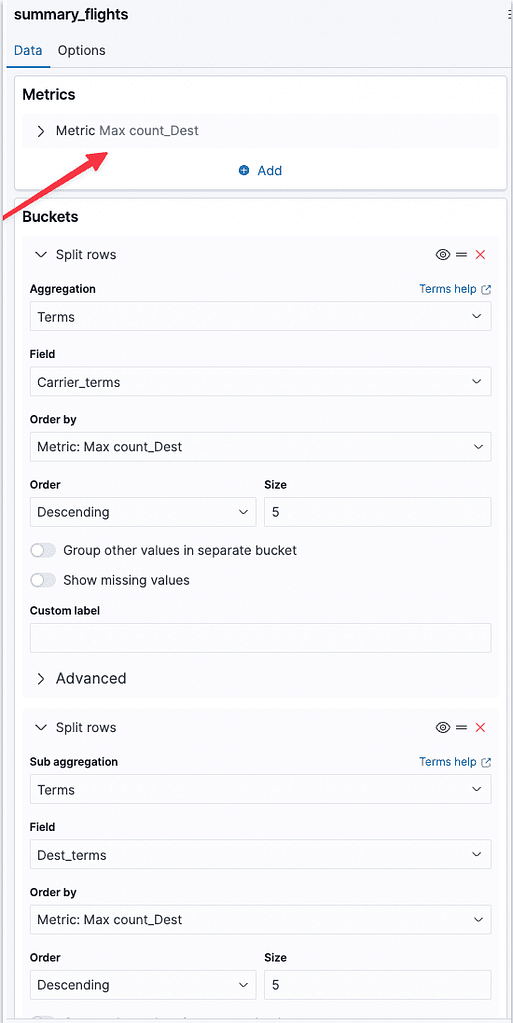
Always expect one document here; represented by one row (airline x destination), so Min, Max, and Top hit yield the same result.
This is how the visualization will look, just like the one we created with the built in index:
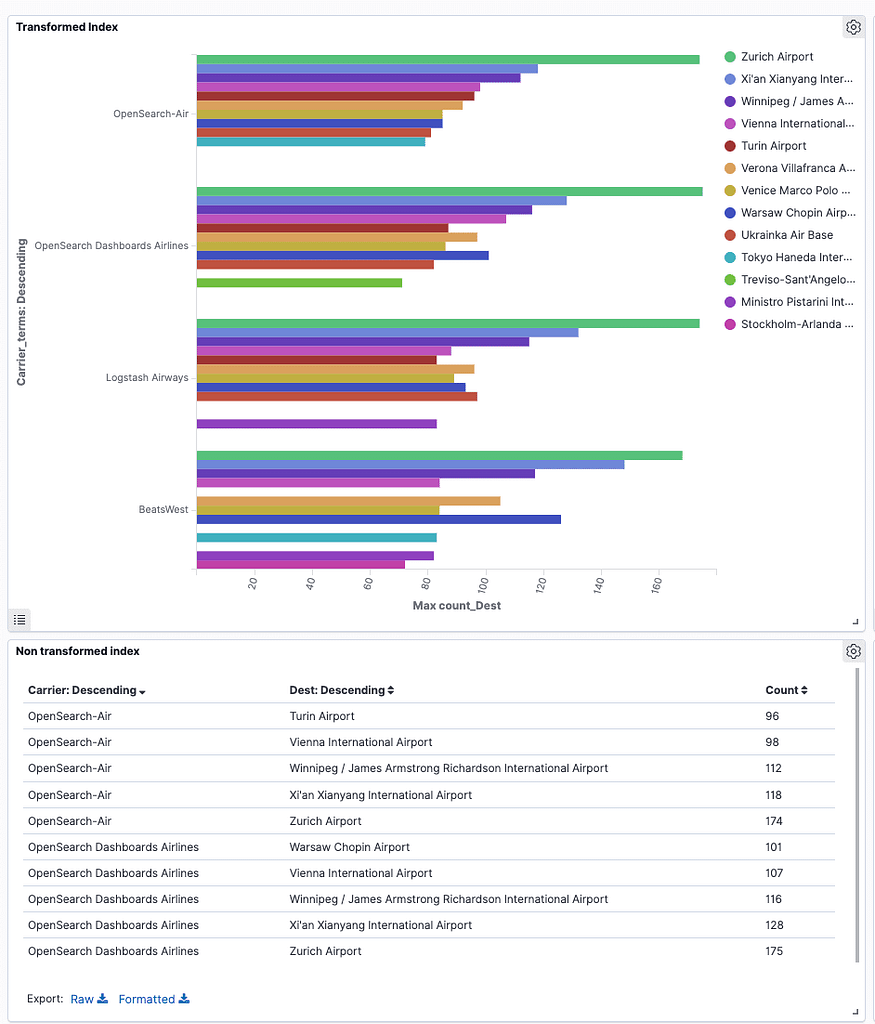
Now, the same results are achieved, but by saving loads of space, and running a faster query.
Transform indices are much lighter and more efficient for aggregation tasks, but keep in mind that:
- This new index will only contain the fields selected in the transformation phase
- The new index is “timeless,” you cannot run timeline charts
Example use case: keep a full version of the index for the most recent data, and store the older data as much lighter transform indices, keeping what is more relevant and saving space.
Conclusion
Transforms are very handy to condense data when granularity is not required but aggregated results are. Operating on transform-based indices instead of raw data saves a considerable amount of space and processing resources when running queries.